Ever wondered why some live streams are perfect while others are full of buffering? In today’s world of streaming technology, knowing how to use an IPTV encoder is key. It can make all the difference in your streaming quality. This guide will cover everything you need to know about IPTV encoders.
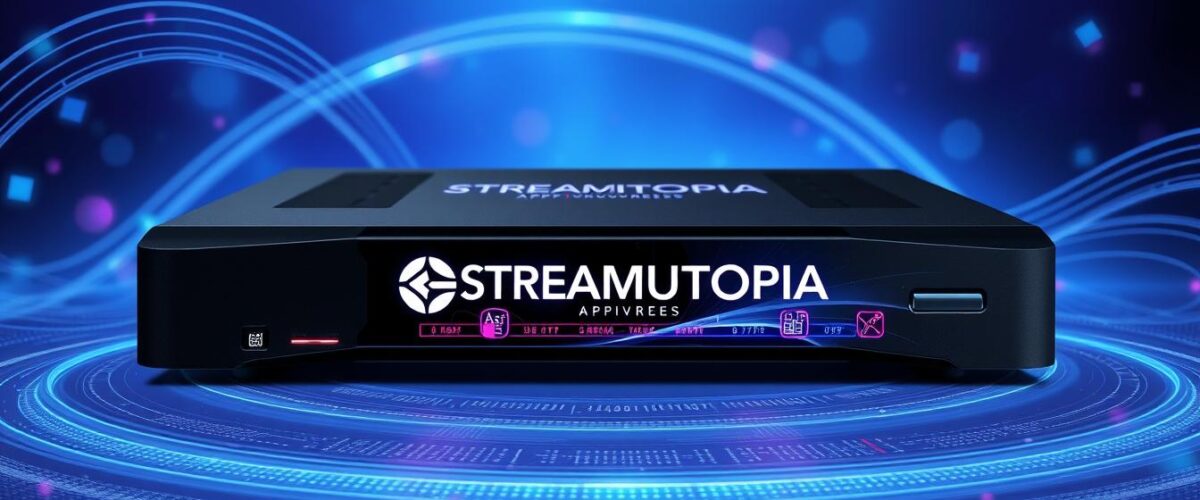
From their role in IPTV services to the must-have components for top-notch streaming. By the end, you’ll know how to improve your streaming. Plus, you’ll see how working with a top service like StreamUtopia.com can take your content to the next level.
Key Takeaways
- IPTV encoders compress video using advanced codecs like H.264 and H.265 for efficient streaming.
- Adaptive streaming technology offers smooth viewing experiences by adjusting video quality based on internet speed.
- Choosing the right IPTV encoder involves assessing compatibility with streaming platforms and reliability.
- Real-time encoding helps reduce buffering, ensuring seamless playback for viewers.
- Professional encoders provide support for various resolutions, including up to 4K, for high-quality visuals.
Understanding IPTV Streaming
IPTV streaming is a big change in how we watch videos. It uses the internet instead of old cable or satellite systems. This lets users watch TV through their internet connection. It offers both live shows and things to watch later, giving lots of choices.
With IPTV, you can find lots of movies, TV shows, and more right away. This makes watching TV a personal experience. You can pick channels you like, making it more fun. IPTV works on many devices, like phones, smart TVs, and boxes.
This tech also has low delay, so you can chat live and watch webinars without lag. It uses special ways to send content, making live shows and personal videos work well. High-quality HDMI IPTV encoders help make sure the video looks great.
Getting IPTV can save a lot of money compared to old TV ways. Many services have good prices, helping both businesses and people save. Knowing how IPTV works, like video quality and needing fast internet, is key for a good watch. For those wanting to try IPTV, Streamutopia has lots of channels and a big VOD library.
What is an IPTV Encoder?
An IPTV encoder changes raw video into a digital format for streaming online. It uses video compression to save bandwidth without losing quality. This makes videos work well on many devices.
The J-Tech Digital JTECH-ENCH4 encoder is a top example. It supports H.264 encoding and protocols like UDP and HTTP. It can adjust settings to use network bandwidth wisely.
The JTECH-ENCH4 encoder is flexible for broadcasting. It handles up to 1080p@60Hz HD video input. Users can adjust the quality as needed. It also has a one-button reset for easy fixes.


QIP IPTV encoders offer dual encoders, making them cost-effective. They support various inputs like HDMI and SDI. These encoders create high-definition streams, showing the importance of a good digital format.
Benefits of Using an IPTV Encoder
Using an IPTV encoder offers many benefits for both content providers and viewers. One key advantage is the high-quality video it ensures. With the right settings, viewers enjoy clear and detailed video, perfect for smooth streaming.
Efficient bandwidth management is another big plus. It keeps video quality high while using the internet wisely. This prevents streaming interruptions and ensures a great viewing experience. It’s also crucial for interactive content, like virtual events and gaming.
Being compatible with different platforms and devices is important for smooth playback. The right encoder settings make sure content looks good on all devices. Plus, it uses resources well, making streaming smooth and efficient.
Content protection is also a big benefit of IPTV encoders. They use encryption to keep live streams safe from unauthorized access. This creates a secure viewing environment. New technologies, like the TBS2631SE 8-Channel HDMI Encoder, offer even better performance.
Using efficient codecs like H.264 and HEVC improves content delivery. Formats like RTMP and SRT add to the streaming’s robustness. As streaming technology advances, low latency becomes even more important for interactive videos. IPTV encoders ensure high-quality experiences now and in the future.
Hardware Encoder vs. Software Encoder
Live streaming has become very popular, especially after the COVID-19 pandemic. It’s now more important than ever to ensure high-quality streams to keep viewers engaged. Poor video and audio can ruin the experience, making the encoder choice critical.
Hardware encoders are preferred by pros for their top-notch performance. They handle big data loads well and offer a stable stream. These devices cost between $600 and $1000, showing their advanced features and quality.
On the other hand, software encoders are great for beginners and those with some experience. They’re affordable, costing under $100 or even free. Programs like Wirecast offer cool features like multi-guest streaming and virtual sets, appealing to both home and professional streamers.
Setting up your encoder is key, whether it’s hardware or software. Both convert raw video into a streamable format. Transcoding and encoding are key steps to improve video quality based on internet speeds, ensuring a smooth stream.
Choosing between hardware and software encoders depends on your needs and budget. As streaming technology grows, knowing the differences helps make better choices for a great streaming experience.

Preparing Your Equipment for Streaming
To get high-quality streams, you need the right gear. Different parts affect your audio and video. Choosing good streaming hardware is key to a pro-grade stream.
Invest in top-notch camera and microphone options. This will greatly improve your stream’s quality.
Essential Components for Successful Streaming
Starting with the right gear is crucial. Many things impact your setup, like camera and microphone choices. Here’s a look at popular options for different budgets:
| Equipment | No to Low Budget | Moderate Budget | Big Budget |
|---|---|---|---|
| Camera | Your device’s camera (free) Razer Kiyo Streaming Webcam ($79) |
PANASONIC V770K HD Camcorder Black ($599) | SMTAV PTZ Camera with 3G-SDI, HDMI ($799) NDI 4K UHD Camera BA20UHD-N ($1499) |
| Microphone | Your device’s microphone (free) Rode NT-USB ($169) |
Shure MV7 ($249) Blue Yeti X ($139) |
Neumann TLM 102 ($799) |
| Mixing Equipment | Behringer Xenyx 502 ($39) | Yamaha MG06 ($136) | Yamaha MG16 ($617) Behringer XR18 Digital Mixer ($699) |
| Lighting Setup | Natural lighting (free) LimoStudio Rectangular Softbox with Single Socket Complete Kit ($86.39) |
Neewer 2 Pack Dimmable Bi-color 480 LED Video Light ($219.99) | GVM-50W2 50W High Power Floodlight Bi-Color and High Power RGB Lighting Kit ($399) |
| Video Switcher | OBS Studio (Free) Elgato Stream Deck ($149) |
RGBlink Mini ($279) | ATEM Mini Pro ($495) Roland V-1HD ($595) |
| Encoders | OBS Studio (Free) | Blackmagic Design Web Presenter ($495) Wirecast ($599-$799) |
Live Streaming IPTV Encoder | VECASTER HD ($995) |
Choosing the Right Camera and Microphone
Choosing the right camera and microphone is key. A good camera makes your video clear and quality. For sound, a top-notch microphone is essential.
Options like the Rode NT-USB or Blue Yeti X offer great sound without costing too much. Always test your gear to make sure it works well. Different setups can perform differently.
How to Set Up and Use an IPTV Encoder for Smooth Streaming
Setting up an IPTV encoder is key for smooth streaming. You can choose between hardware or software encoders. Each has its own steps to follow for the best streaming experience.
Step-by-Step Guide for Hardware Encoders
Using a hardware encoder? Follow these steps for a great setup:
- Connect the hardware encoder to your video source and internet. Use HDMI or SDI cables for reliable video input.
- Configure the device settings to match the requirements of your streaming platform. This can include adjusting resolution settings to support SD, HD, or even 4K UHD streams.
- Link the encoder to your streaming platform, ensuring to select among supported protocols such as RTMP, RTSP, and HLS for optimal live streaming capability.
Step-by-Step Guide for Software Encoders
Software encoders, like OBS Studio, offer flexibility and features. Here’s how to set them up:
- Download and install the software application onto your computer. Make sure it supports your operating system.
- Adjust the audio and video settings to suit your preferred streaming quality. You can define resolutions and frame rates to enhance user experience.
- Connect your audio and video equipment to your computer. Ensure that the input devices are recognized within the software for effective live video encoding.
The right setup strategy leads to improved content creation opportunities and user engagement. Advanced features in both hardware and software encoders improve performance and reach on platforms like YouTube and Facebook Live. Mastering encoder setup is the first step to streaming success.

The table below summarizes the features of popular hardware and software encoders. It highlights aspects like resolution support and simultaneous streaming capabilities:
| Encoder Type | Supported Resolutions | Protocols Supported | Simultaneous Streams |
|---|---|---|---|
| Hardware Encoder | SD, HD, 4K UHD | RTMP, HLS, RTSP | Up to 4 platforms |
| Software Encoder (OBS) | SD, HD 4K UHD |
RTMP, RTSP, HLS | Multiple platforms based on settings |
Connecting Your Encoder to the Streaming Platform
Connecting your IPTV encoder to a streaming platform is key for live streaming success. Knowing how to link your encoder boosts your broadcast’s reliability and quality. Platforms like YouTube, Twitch, and Facebook Live use different protocols to make integration easier.
First, check your upload speed. You’ll need at least 5-10 Mbps for smooth streaming. Using a wired internet connection is better than wireless for stability.
Then, look at your encoder and streaming platform settings. Adjust your encoder’s resolution and bitrate to meet the platform’s needs.
For software encoders, tools like OBS Studio let you tweak video, audio, and output settings. This customization improves streaming quality based on your hardware. For audio, aim for a 320 KBPS bitrate for better sound during live streams. Hardware encoders like Blackmagic Web Presenter 4K or Elgato handle video data well.
By following these steps, you’ll enhance your streaming and give your viewers a great experience. Be ready to fix any issues that come up. This way, you’ll ensure a high-quality broadcast.
Configuring Encoder Settings for Optimal Performance
Setting up encoder settings is key for top streaming performance. Making the right video and audio tweaks can really boost your stream’s quality. Adjusting things like resolution, bitrate, and audio channels lets you fine-tune for your content and viewers’ devices.
Adjusting Video and Audio Settings
For the best results, tweak your video and audio settings. Choosing the right video resolution is critical. Here are some common ones:
- 1080p (1920 x 1080 pixels)
- 720p (1280 x 720 pixels)
- 480p (720 x 480 pixels)
- 360p (640 x 360 pixels)
- 240p (426 x 240 pixels)
720p is often the sweet spot for quality and bandwidth. Make sure your video bitrate matches your resolution for clear video and efficient data use.
Don’t overlook audio settings. Picking the right audio sampling rate, like 44.1k or 48k, can improve sound quality. Audio bitrates should be between 64kbps and 256kbps for good sound. These settings help ensure a great viewing experience, no matter the device or internet speed.
Testing Your Live Stream
Before you go live, it’s key to do a configuration check. This ensures your stream works perfectly. You can use tools like OBS to make quick changes as you test.
A survey found that 65.8% of people care most about the quality of their streams. This shows how important it is to focus on streaming diagnostics during testing. Here are some tips to improve your stream:
- Make sure your upload speed is at least double your bitrate for a smooth stream.
- Keep keyframe intervals between 2 to 3 seconds for better video quality.
- Use a wired ethernet connection instead of 4G or Wi-Fi for stability.
- Offer different stream qualities, like HD and SD, to meet different viewer needs.
Use tools like VLC or mpv to check your stream’s quality. Look for any issues and fix them before going live. Make sure your settings, like chunk size and permissions, are right.
| Test Aspect | Recommendation |
|---|---|
| Upload Capacity | At least double the desired bitrate |
| Keyframe Interval | 2 to 3 seconds |
| Connection Type | Wired ethernet preferred over 4G or Wi-Fi |
| Stream Quality | Offer HD and SD options |
Being careful with your streaming diagnostics can really make a difference. Following these steps will help your live stream succeed from the start.
Troubleshooting Common Streaming Issues
Streamers often face many challenges, even with the best setups. It’s key to know the common issues to fix them well. This ensures a smooth watch for viewers. Here are some common problems that streamers might run into.
Identifying Common Problems
- Buffering and Freezing: This usually happens when internet speeds are too low. You need at least 7-10 MBPS download speed and 1-3 MBPS upload speed. For Ultra HD streaming, you need 25 Megabits per second to avoid problems.
- Poor Audio Quality: Bad sound can ruin the experience. It might be due to old gear or wrong audio settings.
- Connection Drops: These can happen if your bandwidth is too small or if your server isn’t good. Good servers cost between $15 and $25 and can make your stream much better.
Fixing live stream errors early helps keep the broadcast going smoothly. Here are some tips to help:
- Use a wired connection instead of Wi-Fi, with at least 25Mbps to the modem.
- Try Ethernet Power Line Adapters to keep your internet stable.
- Change your buffer size settings to match your internet speed to reduce buffering.

By tackling these common issues early, streamers can greatly improve their broadcasts. This makes their viewers happier too.
Enhancing Streaming Quality with an IPTV Encoder
An IPTV encoder is key to better streaming quality. It offers multi-bitrate streaming and adaptive bitrate switching. This means viewers get a smooth streaming experience, even with changing internet speeds.
Using an IPTV encoder also helps in compressing video signals well. It uses tech like H.264 or H.265 to make files smaller without losing video quality. This is great for saving bandwidth while keeping visuals sharp.
In live streaming, low latency is crucial. IPTV encoders work fast, keeping broadcasts real-time. This makes events more engaging for viewers. They also support many streaming protocols, like RTMP, HLS, and MPEG-DASH. This makes it easy to reach more people on different devices.
Here’s a table summarizing the key features that enhance streaming quality with an IPTV encoder:
| Feature | Benefit |
|---|---|
| Multi-bitrate Streaming | Provides video quality tailored to viewers’ internet speed. |
| Compression Technologies | Reduces file size while maintaining video quality. |
| Low Latency | Ensures minimal delays in live streaming. |
| Support for Streaming Protocols | Enables compatibility with various streaming platforms. |
| Adaptive Bitrate Streaming | Automatically adjusts video quality based on bandwidth availability. |
Understanding IPTV encoders helps content creators improve streaming quality. This ensures viewers have a great experience that meets their expectations.
Choosing the Right IPTV Encoder for Your Needs
Choosing the right IPTV encoder is key for top-notch streaming. It’s important to look at compatibility with your streaming platforms. Make sure the encoder works with protocols like RTMP, HLS, and MPEG-DASH.
Also, think about the compression efficiency of the encoder. HEVC is great because it saves space without losing quality. This is crucial for streaming HD content.
Don’t forget about error correction and adaptive streaming. These features make your broadcasts more reliable. The encoder’s speed also matters for smooth streaming.
Lastly, the encoder should be easy to use. It should set up quickly and easily.
Here is a comparison of some leading HEVC IPTV encoders available in the market:
| Encoder | Video Quality | Compression Efficiency | Compatibility | Price Range |
|---|---|---|---|---|
| Brand X Encoder | 4K | High | Various Platforms | $600 – $800 |
| Company Y Encoder | HD | Moderate | Multiple Protocols | $400 – $600 |
| Product Z Encoder | 4K | Very High | Extensive | $800 – $1000 |
When choosing an IPTV encoder, consider video quality and price. This choice affects how happy your viewers are and how well live streams work. The closer your encoder fits your needs, the better the streaming will be.

Future-Proofing Your Streaming Setup
Streaming technology is always changing. It’s important to keep your setup up to date. By focusing on future-proof streaming, you can meet new viewer demands and tech standards.
Using scalable encoder solutions is a key step. These encoders can grow with your needs. Companies like Teradek and Blackmagic Design have solutions for all types of streaming.
Staying current with streaming tech is crucial. Watch your performance to see where you can improve. Upgrading to better codecs, like H.265/HEVC, can boost video quality and save bandwidth. This is especially helpful for live streams.
- Invest in robust hardware encoders for low-latency applications.
- Explore lossless compression formats to maximize quality.
- Utilize data-driven insights to personalize viewer experiences.
- Engage with your audience through feedback mechanisms to refine your offerings.
By following these tips, you can make your streaming setup ready for the future. This way, you’ll not only improve your viewers’ experience but also stay ahead of tech changes.
Conclusion
Mastering an IPTV encoder is key for better streaming. Knowing how encoders work helps improve your stream’s quality and reliability. A good encoder makes sure your viewers get the best streaming experience without any hitches.
Choosing the right IPTV encoder depends on your needs and content. Devices like the J-Tech Digital H.264 Encoder and the VeCASTER-HD-H.264 are great options. Always test your encoder and make sure your internet connection is stable for the best results.
By using what you’ve learned, you can share great video content. The right tech and a smart approach create a top-notch streaming setup. This lets your viewers watch what they like, whenever they want. Start using these tips to boost your streaming game.
FAQ
What is an IPTV encoder?
Why should I use an IPTV encoder for streaming?
What are the differences between hardware encoders and software encoders?
What equipment is necessary for setting up an IPTV encoder?
How do I set up my IPTV encoder?
What settings should I configure on my IPTV encoder for optimal performance?
How do I test my live stream before going live?
What are common streaming issues I might encounter?
How can I improve the quality of my IPTV streaming?
What factors should I consider when choosing an IPTV encoder?
How can I future-proof my streaming setup?